When I started off with Montessori 2 years ago I thought I needed all the materials. They each have a specific purpose and skill they teach and they fit together in a perfect way. I thought if I skipped one I’d miss something. But over time I realized that a home won’t be exactly like a Montessori classroom. Without the other children and without the set up of a specific class with only Montessori materials available, things are different. Things work differently. Things have to be adapted. And most people don’t have the money or space for all the materials. So this is what I would have done differently. What materials I would have skipped or substituted or made myself (or which I did make myself) and which ones I’m glad I have. Now what my kids weren’t interested in or loved may be different for someone else’s. Each child is unique. There isn’t one way or one answer, so these are just my experiences and thoughts. I’ve only included the materials that we’ve reached in our journey. There are more primary materials but we haven’t come to them yet so I can’t comment. I highly recommend getting a set of albums to understand the scope and sequence of each material to help you decide what you need. There are links to sites to purchase materials in the pictures and in the written text.
Language
Moveable Alphabet
I started off doing cursive because that is what is recommended in Montessori. It’s said it’s easier for a child to write as they don’t have to take their pencil off the paper and that it activates a different part of the brain. Pumpkin 1 learned the cursive lower case letters and picked up print letters on her own too but she really struggled with writing. When she did start writing she wrote in print. It seemed that cursive has too many steps to remember vs print. She wants to write in print so I’m following her lead and have shifted my materials to print. The print moveable alphabets are a little cheaper. You could also get this verson on Amazon from Learning Resources set which is also magnetic

It doesn’t have as many letters as the wood moveable alphabet (and is the wrong colours) so if you do want more letters then buying two is about the same price as buying the wood set. One set fits perfectly in this box.

If money is really tight you could print off a paper version and the above box is a great way to store it too.

Sandpaper Letters
I went with these sandpaper letters when I switched to print to use with Pumpkin 2. I actually really prefer them. The sandpaper is great, it doesn’t shed sand everywhere and they’re smaller which is helpful when it comes to storing. They come in a nice sturdy box. They’re not colour coded like the Montessori sandpaper letters are.

It’s also pretty easy to make your own “sandpaper” letters from sticky back felt.
Another alternative is these grooved boards from IFIT Montessori.

These have upper and lower case letters and numbers and other symbols so it’s great bang for your buck. You just need a stick of some sort for tracing. I have these and they’re great quality.
Small Objects for the Sound Game or Sound Boxes
These aren’t necessary. You can play the sound game with anything in a room or outside. However my kids do really like them. They like to sort them out.
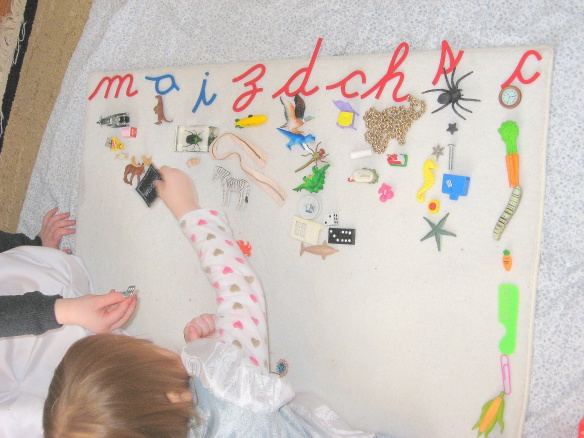
They can be a bit of a distraction though. I had a bunch from my mother (who is a teacher) and bought a set from here. Purchasing a set made things much easier and probably saves money in the long run vs trying to buy your own objects individually. Their set also was carefully thought out with many of the objects able to be used for CVC words and phonograms as well as tricky letters like infant for “i” and vacuum for “v”. One could also print off pictures.
Metal Insets
These are great to have for developing writing skills. They are super expensive though. However, there is a very affordable plastic version available on Amazon.com (and ships to Canada). I recommend having them.
Sensory
Pink Tower
I’d say it’d good to have this. It’s still used pretty often by my kids. I haven’t found a set of stacking blocks the same. Having 10 is important (much of the sensory materials are in sets of 10) and the weight is very important (thus nesting boxes just aren’t the same).
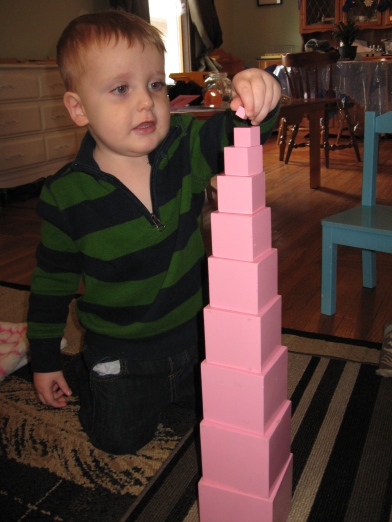
If you know a carpenter they could maybe cut a set for you.
Brown Stair
My son really loves the Brown Stair (mainly to drive cars down it which is a no no in Montessori but I gave up trying to stop him). However, if you’re on a tight budget I’d skip it and just get the Pink Tower. If you are going to get it go with the stained not painted version. My painted version has chipped a lot and I wish I got a natural wood one to prevent this.
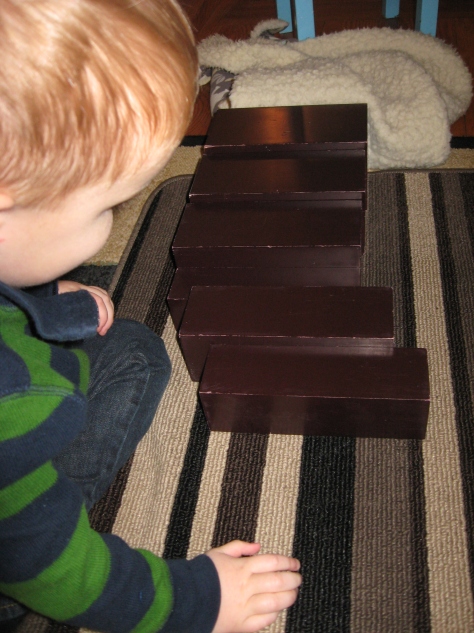
I don’t recommend getting the mini set of either. They just aren’t the same sensory experience. I’d rather skip the Brown Stair than have a mini of both.
Knobbed Cylinders
For some reason I love these and find them very satisfying to do. My kids were crazy about them from about 18 months to 2 and then weren’t interested in them again.
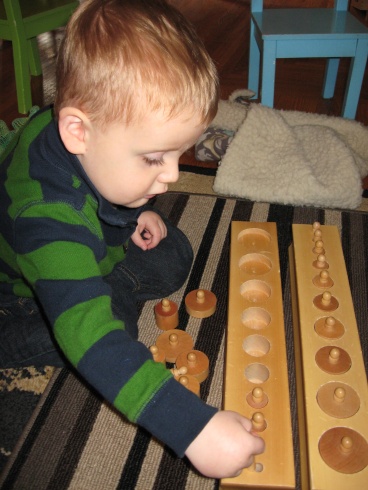
Again don’t waste money on the mini set. Either skip them or Montessori Outlet sells the blocks separably so you could just get 1 or 2 blocks. If your child is 3 or older and you’re on a budget, just skip them. I don’t know why I like them so much but my kids don’t.
Knobbless Cylinders
There isn’t really anything that is a substitute for these. I’d recommend them. I’d probably chose them over the Pink Tower if funds were limited just since they teach a similar concept of size difference in many different ways.
Red Rods
I wasn’t going to buy these but got them in an order mix up and kept them. However, they were almost never used except by Pumpkin 2 as swords. After a million times of taking them away and trying to get him to stop using them in dangerous ways or as a vacuum cleaner or lawn mower (??), I put them in the basement where they remain to this day. Personally I’d go with cuisenaire rods.
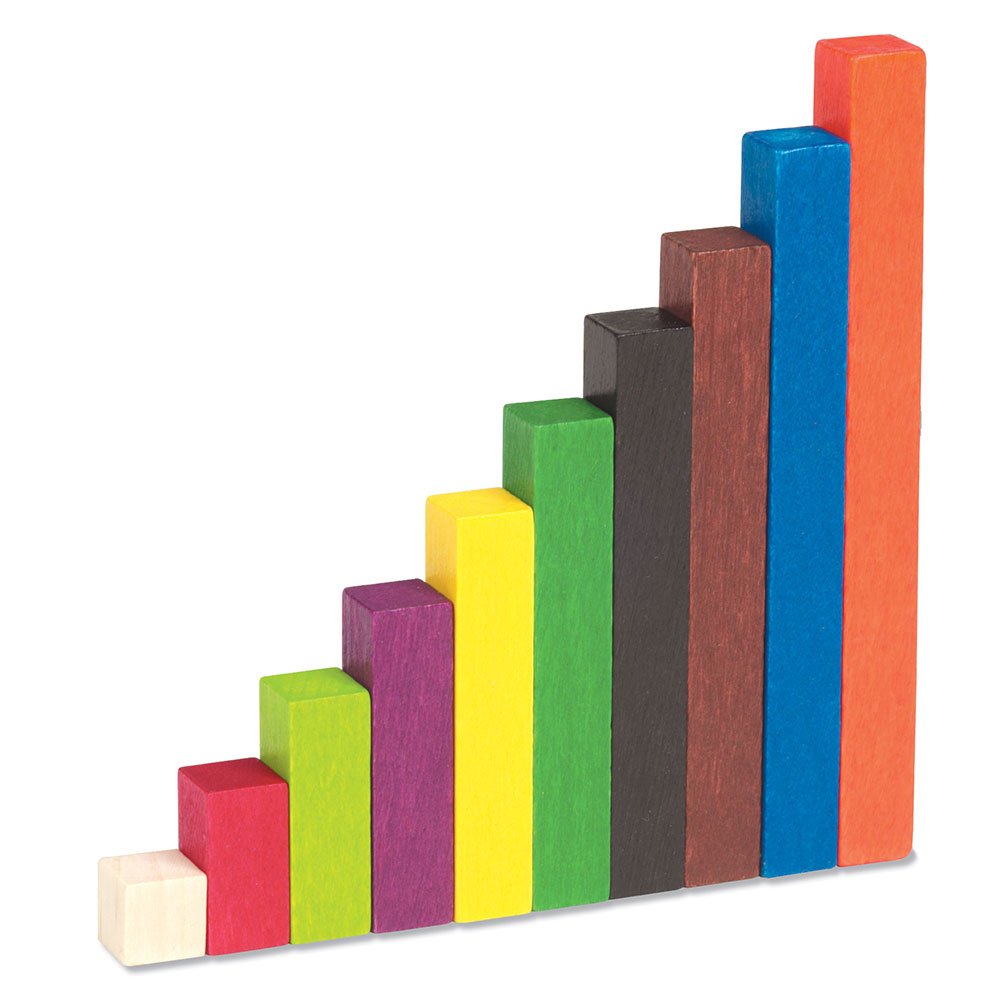
They’re of course way smaller and different colours (so not one concept is isolated and you lose the weight difference) but they so much less dangerous and easier to store in a home. You could paint them all one colour if you wanted. When it comes to some of the sensory materials I feel free exploration is a better way to good. That’s my Reggio side. I’d rather let my kids play with a bunch of cuisenaire rods and learn through play.
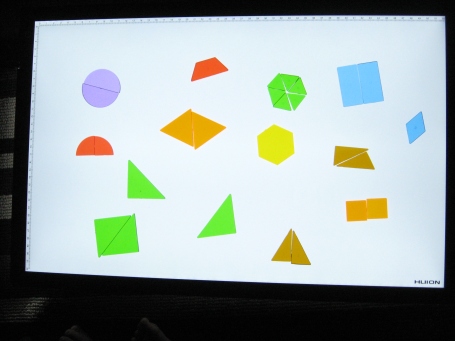
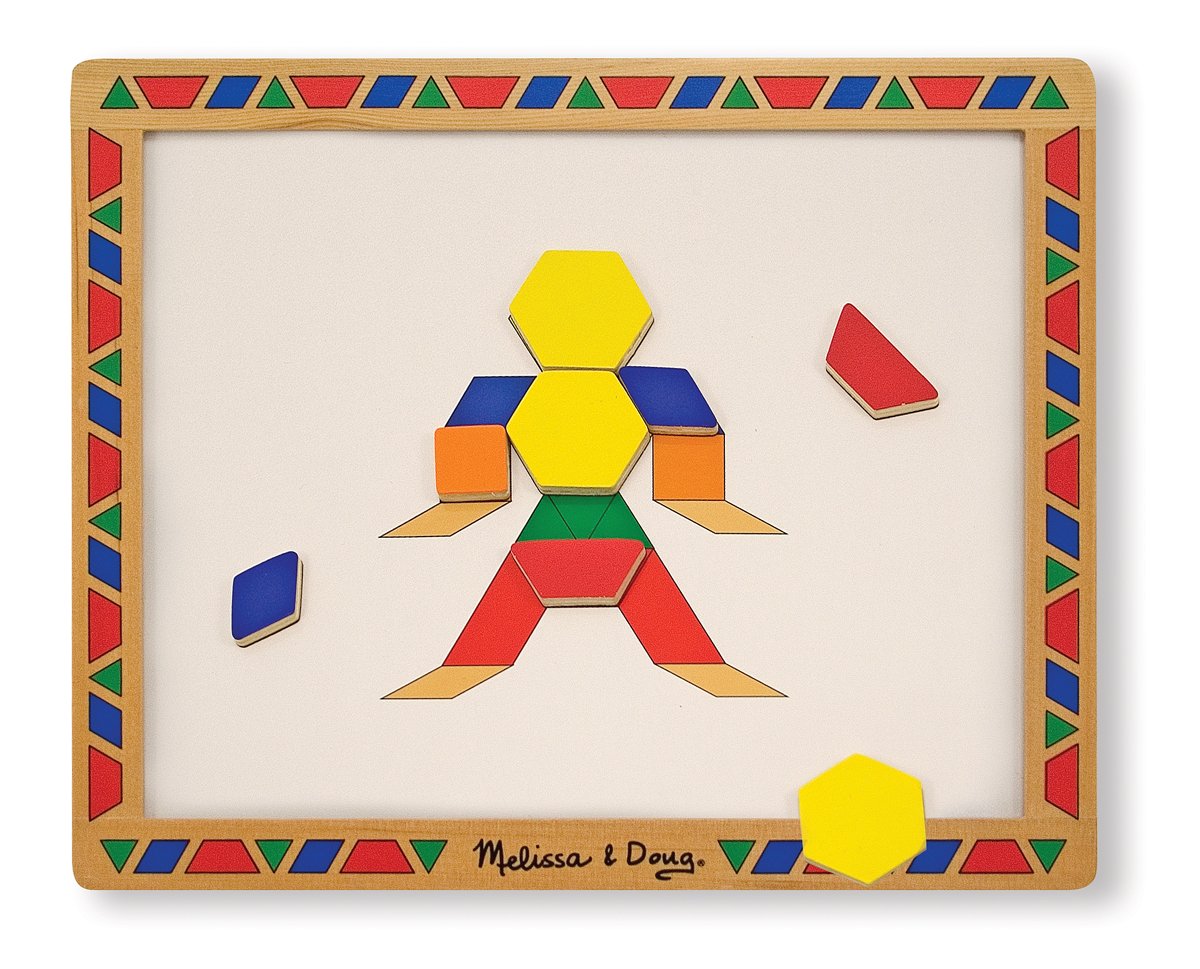
Constructive Triangles
I’m going with the same philosophy when it comes to these too. Learn through play. I really love this Learning Resources set and so do my kids.
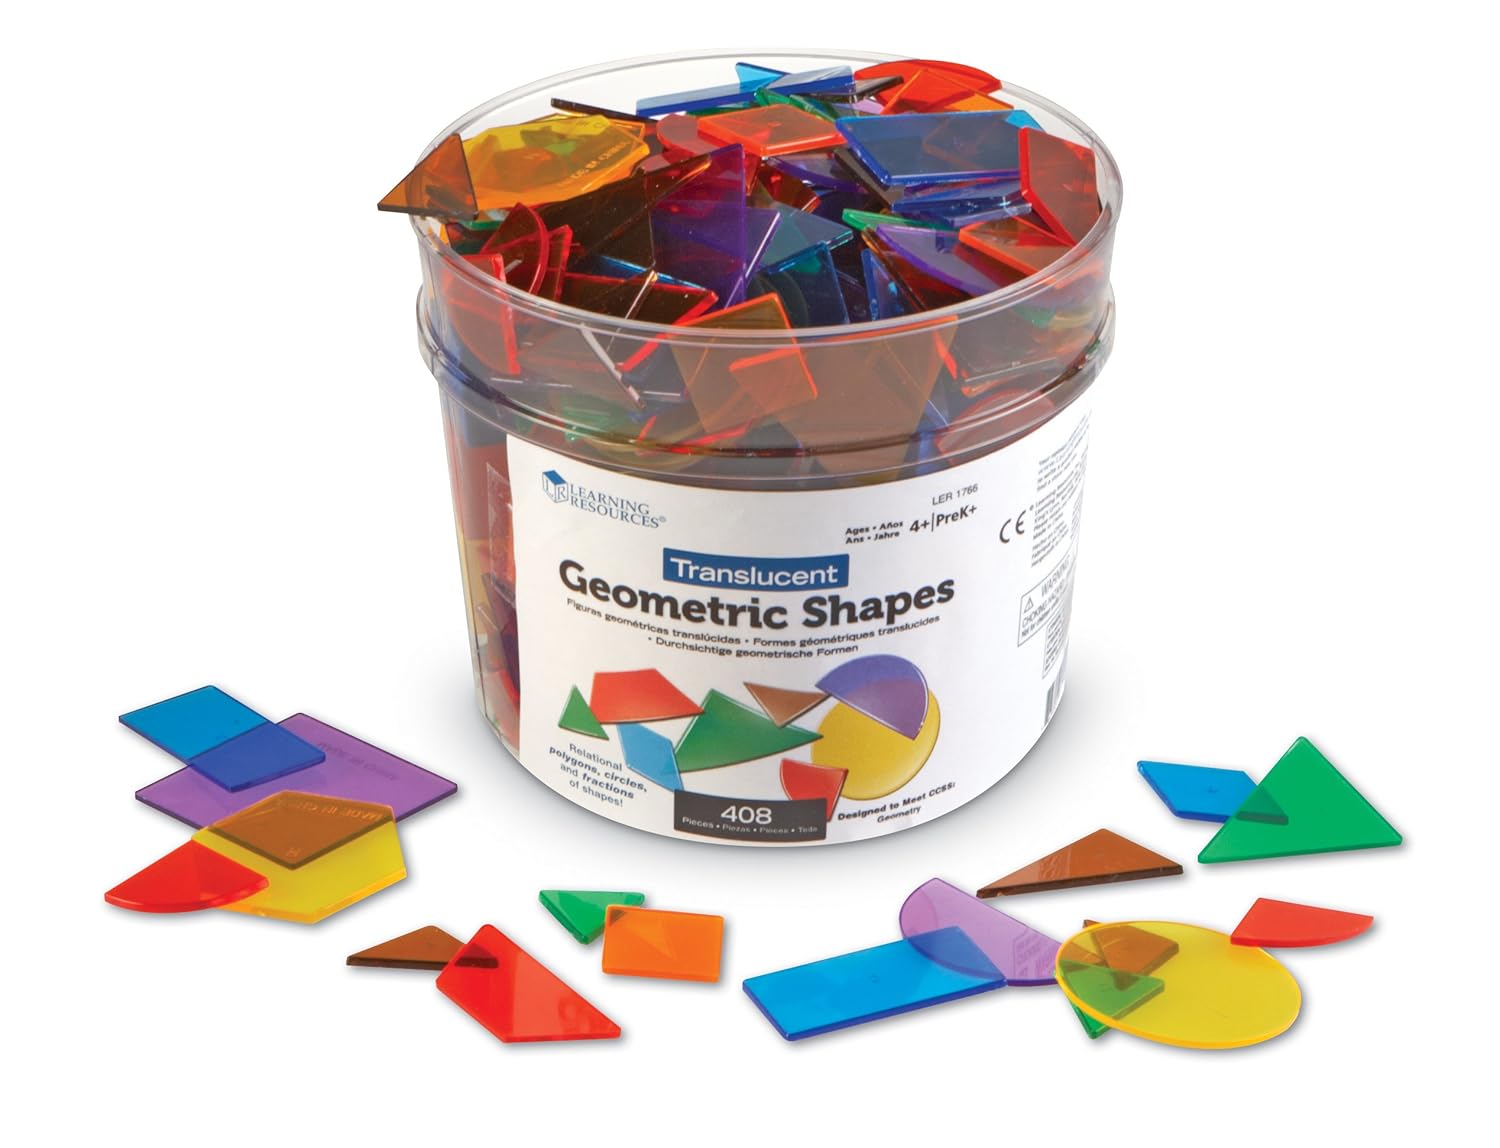
They’re great on the light table and so open ended.
Another alternative is the regular pattern blocks. There’s a ton of patterns you can print off online for kids to use.
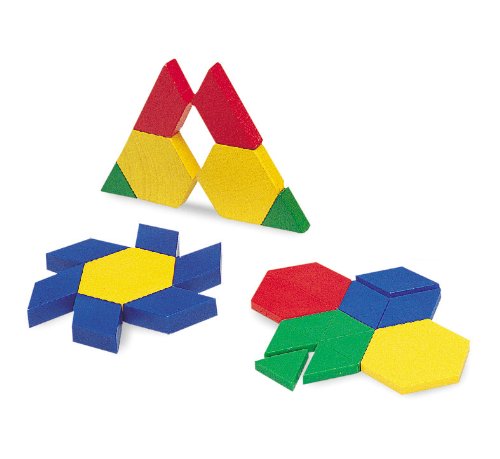
My kids prefer the magnetic pattern blocks though. We have this set by Melissa and Doug and it gets used often though it’s not as durable. I also print off and laminate patterns and use them with the tiles on cookie trays.
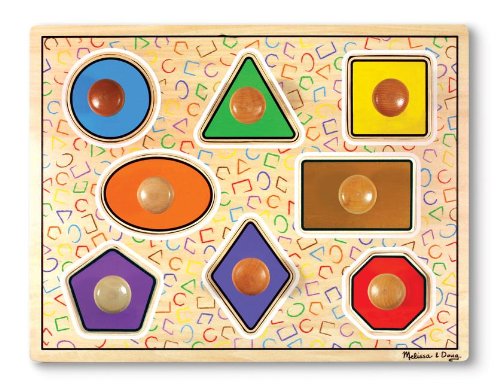
Geo Solids
I haven’t found a set of Geometric Solids that has all the same shapes as the Montessori ones. I’d say it’s important that they be solid wood for the weight (not foam or plastic). The closest set I can find is this one.
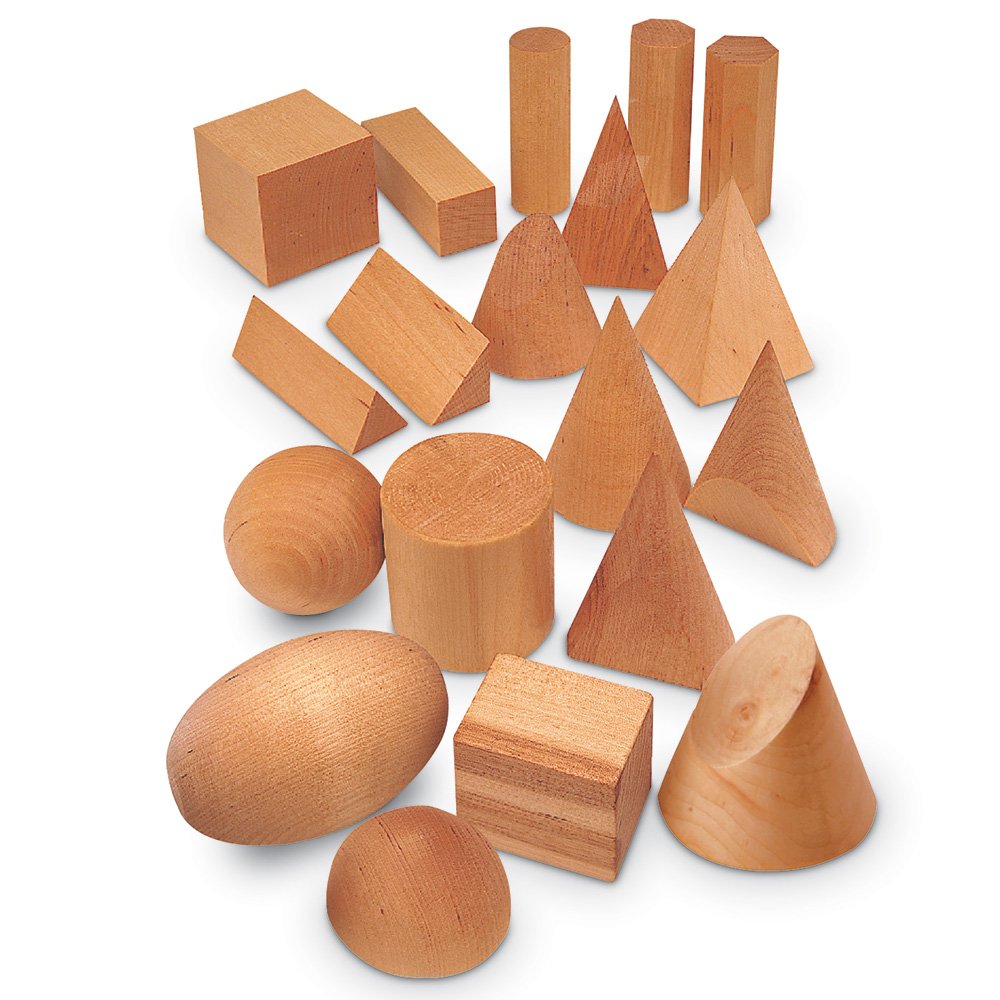
But it has shapes you don’t need, different sizes and doesn’t have an ovoid. You also don’t have the base pieces. But if you’re on a budget this is probably your best bet.
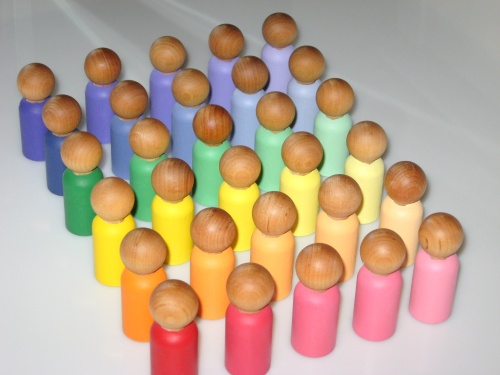
Colour Tablets
My kids were just never interested in these. I painted a set of wooden peg people which my kids liked better but it was tricky to get the shades right.
Easiest thing would be to just get a bunch of paint chips and cut them and use them. You could laminate them for durability. Here are some more DIY ideas:

Sound Cylinders
These are pretty popular here. But they’re not hard to make on your own. See the below link for lots of ideas.

Binomial and Trinomial Cubes
There isn’t really an alternative to these however they don’t get much use in my home. They may come in handy in the elementary years but they wouldn’t be first on my list to purchase of primary materials. However, as I’ve mentioned, some kids really loves them so you’ll have to decide for yourself.
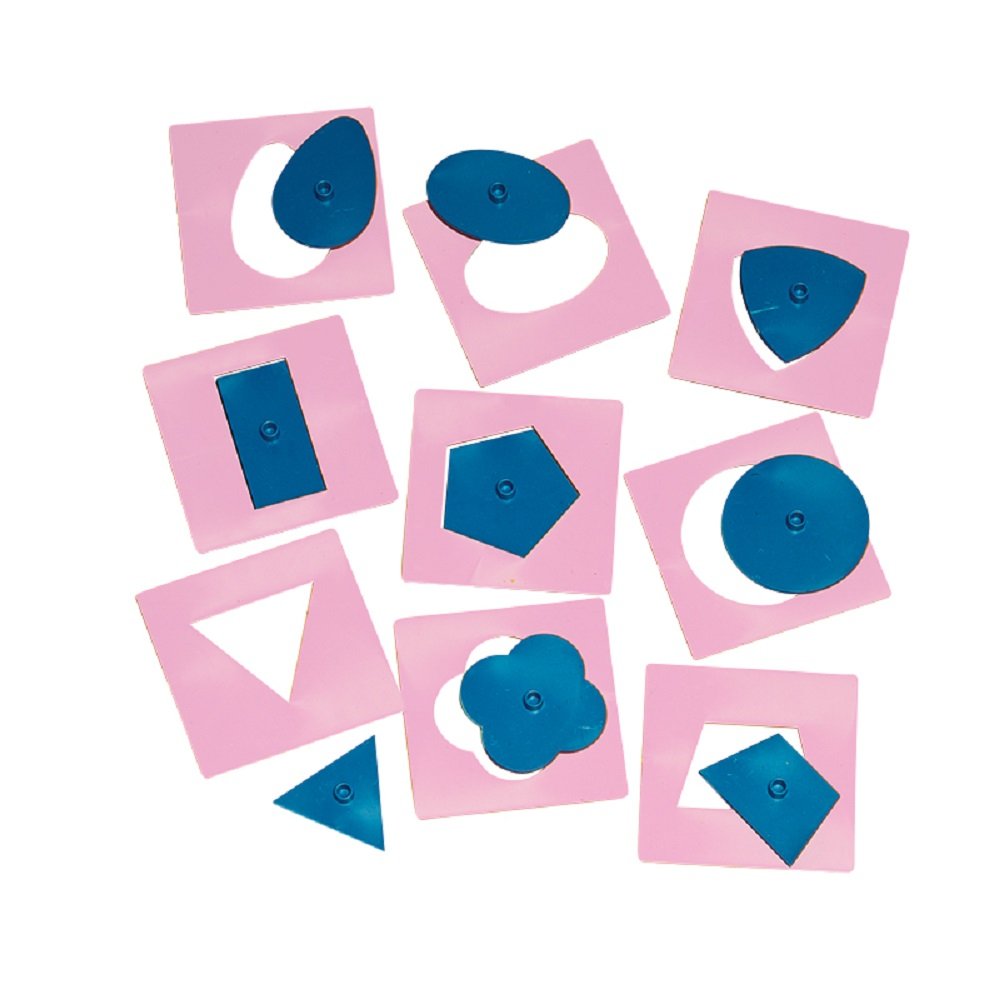
Geo Cabinet
Way too expensive and bulky to make practical for home use. You can get shape puzzles and have your children trace them.
You can also make templates by tracing them for kids to match to. When it comes to the more complicated shapes there are lots of other ways to teach those. Smaller knobs are more desirable though as they teach the pincher grasp so have lots of regular wood puzzles with small knobs for your child to use.
Other Sensory Materials
There are a few other materials like the thermic tablets, baric tablets, fabric squares, smelling bottles, etc…. I think there are many other ways to do these sensory activities and some of the materials are easy to DIY. What you get really depends on you budget. Also many of these require you child to be blindfolded. For some reason my kids always insist on peaking which defeats the purpose.
Math
Number Rods
I only have the table top number rods and those have been enough. Honestly we’ve rarely used them. My kids picked up numbers and one to one correspondence without them. There’s so many ways to teach this, even just in daily life. You wouldn’t miss them if you skipped them.

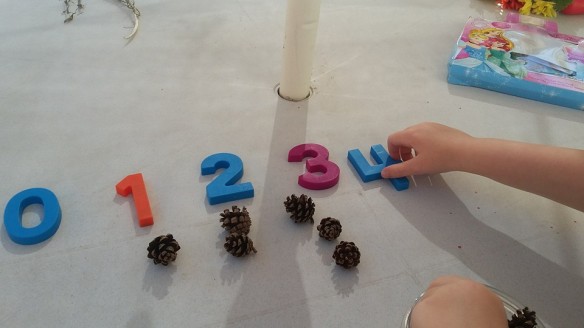
Numbers and Counters
Counters can be anything – stones, buttons, cars, blocks, paperclips, candies. Fridge magnets can be the numbers. Here we are using pine cones we collected with fridge magnets.
Sandpaper Numbers
I’ve never had them or missed them. You could get them, they’re not that expensive, or you could make your own set. You could also get the grooved set mentioned under Sandpaper letters that contains the numbers too.
Spindle Box
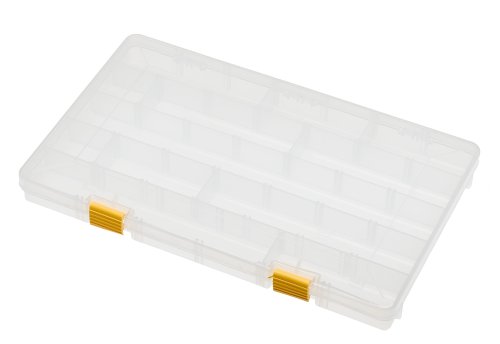
It’s so easy to make your own of these with a tackle box from the Dollar Store and permanent marker and Popsicle sticks.

The great thing about the one I made is you can use it on the light table. We’ve used plastic stir sticks and plastic ice cubes from the Dollar Store.


Stamp Game
Pumpkin 1 much prefers my DIY Stamp Game to the original. And it was so inexpensive to make.

Dollar Store tackle box, glass gems (I did have to hunt and pay more than I wanted for the red ones), permanent marker and wood peg people or you could use game tokens. I just wrote the numbers on the bottom of the gems with permanent marker and voila. Pumpkin 1 likes glass gems. The numbers do tend to get scratch off with rattling around in the box so one day I may coat the bottom in clear nail polish. This set doesn’t have everything the purchased Stamp Games does but we aren’t using those pieces yet and it won’t be hard to add.
Place Value Mat
Not exactly a Montessori material but I highly recommend having one. We use it with the Golden Beads and the Stamp Game. It’s fast and easy to make your own.
100 Chart
This one from Learning Resources isn’t that much cheaper but it’s magnetic so one bump doesn’t ruin all your hard work. Also you can write on it with a white board marker. It’s two sided, one with numbers and the other with just the grid.
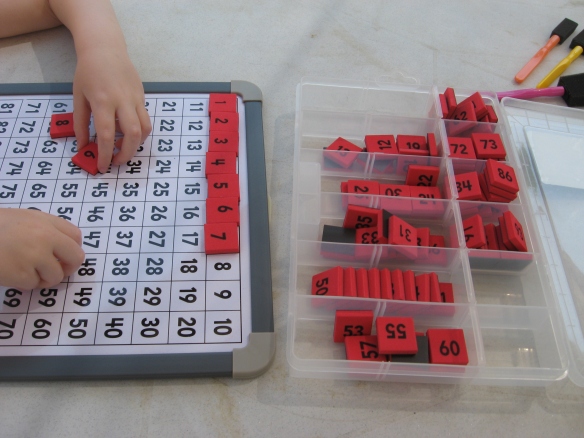
Another idea is just to print one off and use stickers. My kids LOVE stickers.

Teen and Ten Boards
I printed off the Teen Board from Montessori Print Shop and it’s been a hit. I find kids like velcro (I cut velcro to fit in the middle of the “0” of the 10). I bought a Ten Board. Big flop. Pumpkin 1 hates it. I should have just done a printed version.
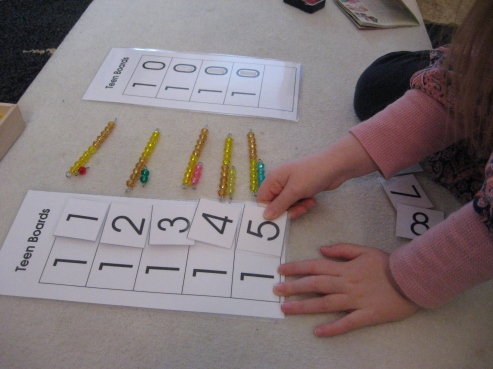
Hanging Bead Stair
There is a 1-9 version and a teen version. They’re not traditional Montessori materials and not necessary to have. However my kids have always enjoyed doing them. I think they liked the fine motor aspect of hanging the beads. You could get the teen one instead of the Teen Board. But again, not necessary though nice to have.
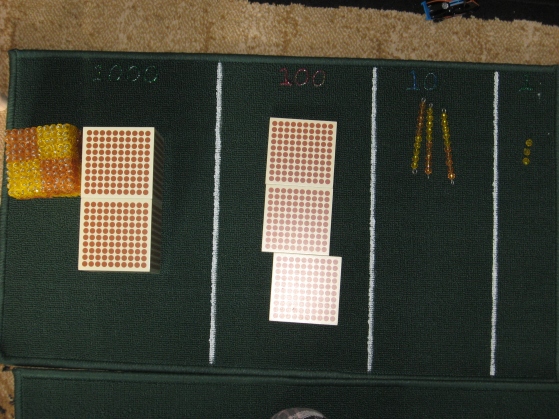
Golden Beads and Math Beads
I love the bead materials. For the Golden Beads one could use base ten blocks but you’d need a lot for the Montessori works. You need at least 9 1000 cubes, 45 hundred squares, and lots of 10 and 1’s. So it may not be worth the cost in the end. Plus the beads really give a visual of the amount. I made my own bead materials (well I should say making, I’m not finished yet though I’ve completed the Golden Beads). I purchased the wood numbers for durability. You need 3 smalls sets and 1 large set. The purchased paper sets aren’t that much cheaper. You can also print your own small for $1 and there’s free large ones here.
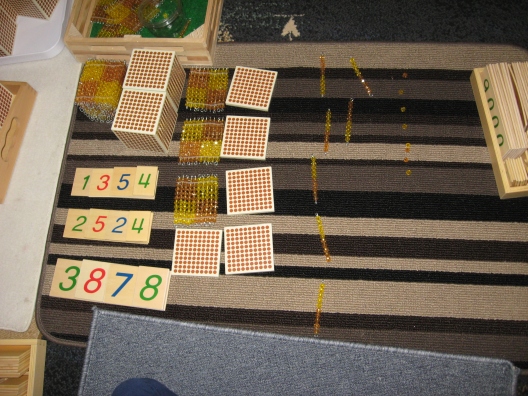
Making your own bead materials isn’t hard, just time consuming. Just make sure you use spherical beads not pony bead or you’ll wind up with rectangles. Pumpkin 1 likes my cheap home made beads better than the purchases ones I have because my faceted ones are more sparkly. Here’s a great tutorial on making your own bead materials (Just note, if you do use wood beads like she did, it’s not going to save you much money. Faceted beads are the most inexpensive way to go). For the wood 1000’s cubes I’d just go with the store bought ones for durability though you can make paper ones. I’d prefer them 3D for the sensory experience. They’re not too pricey. For the 45 100’s wood squares you can print ones off and laminate them.
Geography
World Puzzle Map
My kid prefer the felt one I made to our wood one. It was a lot of work and you can’t trace it to make your own maps but I like it and it takes up less space. The template is from Imagine Our Life and is free.


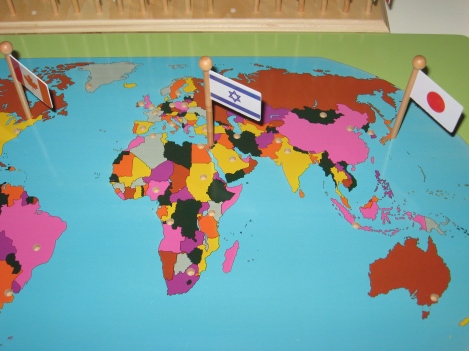
Flags
We do have a world flag map which is a big hit at our house. Pumpkin 1 knows pretty much all the flags so I highly recommend it.
But for the flags of all the countries this is what we did.
The stickers are from this book and there’s two sets. One set I put on the maps that come with the book and put them in a binder and the other set I put on wood rectangles.
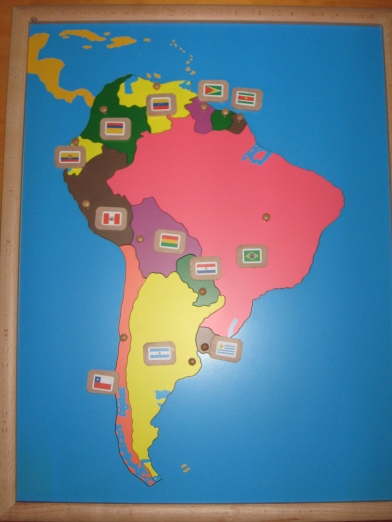
Puzzle Maps
I do have all the Puzzle Maps as I got a good deal on them on clearance. But one could use a globe and an atlas to learn the countries of the world. There are also these cardboard geo puzzles.
If you do purchase the puzzle maps you’ll need a way to store them, they are big. My shelf is made out of an old end table.
Globes
They’re nice to have. They’re not too hard to make yourself. I found small globes at the Dollar Store. This blog’s a great place for DIY ideas.

Land Form Trays
Pumpkin 1 has always loved these. I’d recommend having them as they’re a great sensory experience. You can also make your own. You’ll also need a way to store them. If you purchase I recommend getting the cabinet too.

Continent Boxes
Technically these are supposed to be folders of pictures. This is a great inexpensive way to go. But boxes are fun too. Take your time and don’t try to fill them all at once. I still haven’t done all the continents. Montessori Print Shop has lots of photos and maps you can print off. Many people like to add Safari Ltd Toob figures.
You can put money in the box, books, flags, toys, whatever you come across. Popular in ours is Viewfinder reels.
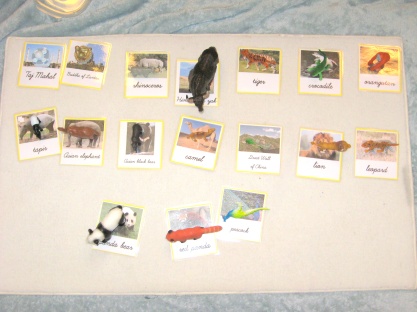
Botany and Zoology
Botany and Zoology Puzzles
I do have these and the storage shelves and they have been very popular in my home. I didn’t realize when I purchased them that the Zoology ones corresponded to the types of Vertebrates and I don’t have the turtle and wish I did. If I were to purchase again I’d spend a little more and get the ones with the bones underneath to fit in with the activities on Vertebrates.

Leaf Cabinet
I have this, I got a deal on it as it was a damaged display model. However we never use it. It’s not really necessary. The metal insets teach the same skill and there are other ways to teach the type of leaf shapes.
Life Cycles
Not exactly a Montessori material, we really love our life cycle figures. We have a combination from Safari Ltd and Insect Lore. Some are available on Amazon, some at Michael’s stores (don’t forget to use a coupon, Michael’s always has coupons).

We also use Safari Ltd figures not just in our Continent boxes and Life Cycles but learning about insects and Vertebrate and Invertebrate sorting.
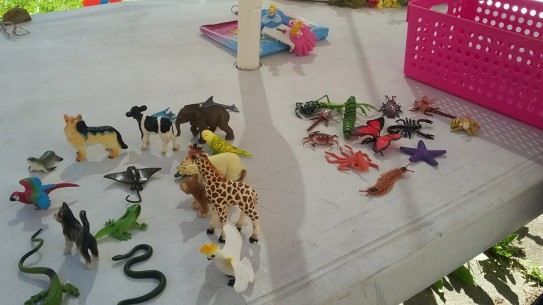
They are great to ask for for Christmas and birthday presents.
Music
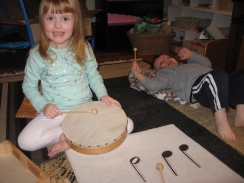
Bells
You’re probably not going to easily find an affordable set of Montessori Bells so you’ll have to DIY.

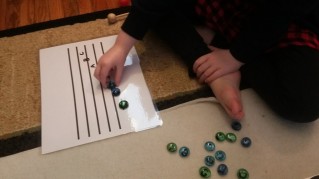
Staff
I made my own staff materials. I used gems for the scale and I printed and laminated notes for rhythm. One could also just put their child in music lessons. Pumpkin 1 was doing piano for a while but we took a break.
Other
There is still other things you’ll need.
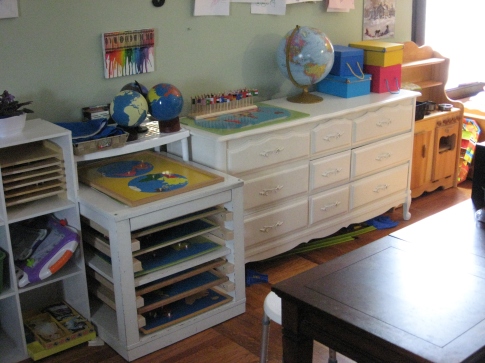
Shelves
You definitely need shelves. Ideally they should be child height but if space and storage is a minimum taller is better. Don’t forget to attach shelves to the wall for safety. You can easily add more storage space to shelves by getting shelf board cut and buying shelf clips. Also these kitchen storage racks work great on cube shelves.

Work Mats
Carpets from the Dollar Store or Walmart work well. Some people use towels. One with lines works well for the Moveable Alphabet.
Album
These are a MUST have in my opinion if you are homeschooling Montessori. I feel Keys of the World are excellent and the most affordable.
Laminator
There are many materials you can print off. Having a good laminator is a must. I have this one.
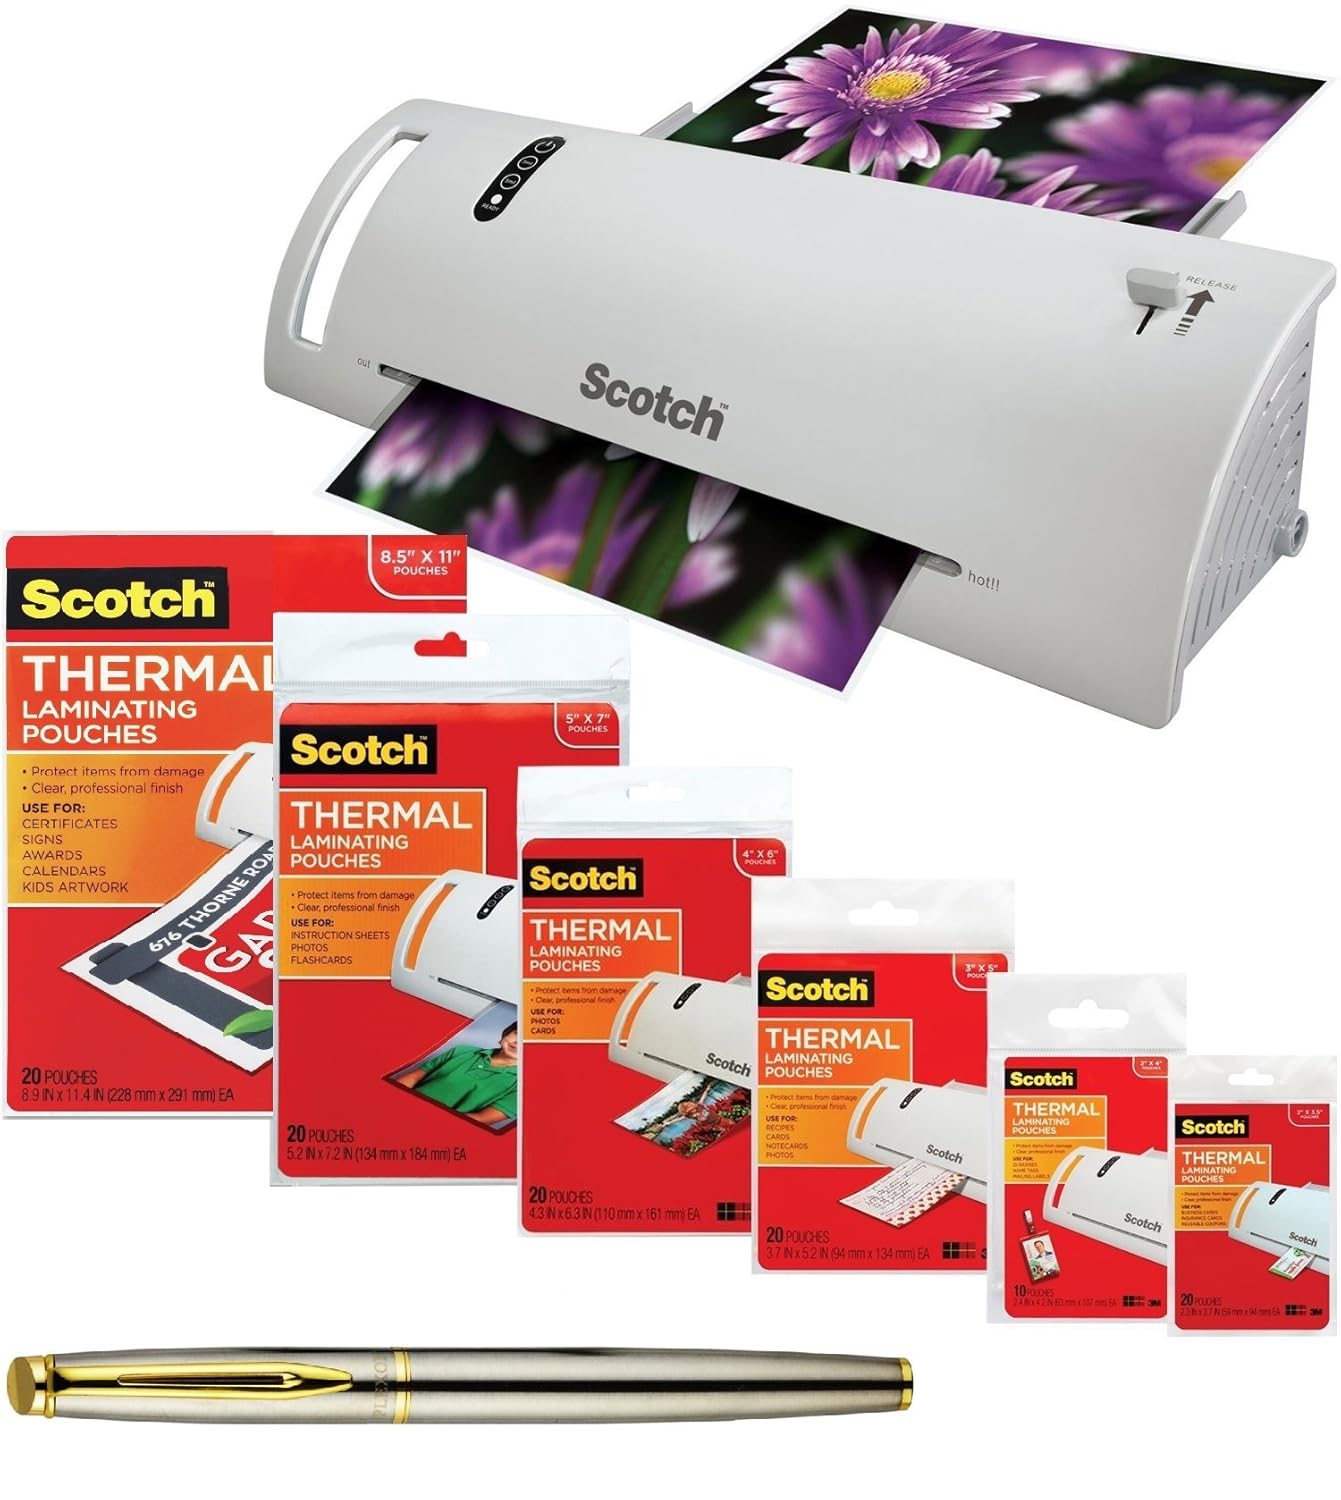
It used to be for sale on Amazon.ca but it seems to be gone. You can check Walmart or Staples. You don’t need a very expensive one but you will need lots of laminating sheets.
Practical Life Items
You can get most of these at the Dollar Store or use items around your house.
Trays
You’ll need lots of storage trays. I do like the look of wood trays but plastic works fine. There are lots of trays at the Dollar Store. Try to use all the same colour, like white or tan, to keep it from being distracting.
So I know I’ve probably forgotten some things but I hope this is a pretty helpful list of the materials and what has worked and hasn’t worked for us. I hope it helps those who are just starting out make the difficult decisions on how to Montessori on a budget and what to purchase.